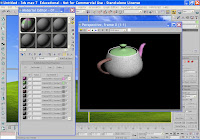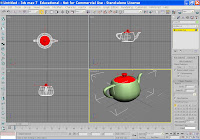


This technique is great when you have a poly model that requires different materials - such as a character wearing clothes.
- Click and drag a teapot into the perspective viewport.
- Convert the teapot to an editable poly.
- In the modify panel, check element.
- Scroll down to polygon properties to Material ID
- Click on the teapot spout and allocate ID 1
- Click on the lid and allocate ID 2
- Click on the belly of the teapot and allocate ID 3
- Click on the handle and allocate ID 4
- Come out of editable poly.
- Open the material editor.
- Click on Standard to pull up the proceedural map menu > choose Multi/sub object material > OK.
- You now have 10 material slots. You add materials or maps to the first four slots. Click on Material#standard and either add a map or make your own material. You then see these materials in the sample slot.
- Click and drag the sample slot material to the teapot and the different materials are automatically assigned to the different elements of the teapot.
No comments:
Post a Comment